289 build
-
Roger King

- Posts: 4396
- Joined: Mon Mar 19, 2007 10:29 pm
- Location: St Ives, Cambs
-
Roger King
- Posts: 4396
- Joined: Mon Mar 19, 2007 10:29 pm
- Location: St Ives, Cambs
Re: 289 build
That confused me for a moment - 'don't remember posting that photo'...
Wonder why Colin's throttle shaft mount is that way round?
Wonder why Colin's throttle shaft mount is that way round?
Re: 289 build
The spring needs to be quite strong as the pedal hole is close to the fulcrum so the leaver doesn't work in its favour. So bear in mind when securing the fixing for the other end. Just trial and error with springs. As Roger says better to spring the pedal than put unnecessary load on the throttle actuation rods by loading the carb end.Roger King wrote:Yes, it's for a long return spring. The other end connects to a steel tab fixed under one of the three mounting screws for the footbox fresh air vent, which is not usually fitted to Hawks. I'd rig something up to fit the spring to if I were you. That is a very heavy pedal and the simple return springs on the carb will not do it easily - and if they are strong enough to do so, you will be getting some serious wear on the carb spindles. It's not good practice to have throttle return springs on the carburettor(s) only, the pedal should have its own spring to ensure full 'off' is achieved.
Iain
-
amulheirn

- T289R Committee

- Posts: 1207
- Joined: Mon May 13, 2013 2:30 pm
- Location: Surrey/Hampshire
- Contact:
Re: 289 build
Thanks Iain. Roger's spring looks about 5 inches long in those photos. Most box sets of springs on eBay don't offer anything like that length - do you have any recommendations on suppliers? I've bought most of my hardware from Namrick, but I don't think they do springs.IainS wrote: The spring needs to be quite strong as the pedal hole is close to the fulcrum so the leaver doesn't work in its favour. So bear in mind when securing the fixing for the other end. Just trial and error with springs. As Roger says better to spring the pedal than put unnecessary load on the throttle actuation rods by loading the carb end.
Cheers,
Andy
-
Roger King
- Posts: 4396
- Joined: Mon Mar 19, 2007 10:29 pm
- Location: St Ives, Cambs
Re: 289 build
It's pretty important for pedal return. You can't rely on the carburettor return spring to bring that heavy great pedal back up properly.
-
amulheirn
- T289R Committee
- Posts: 1207
- Joined: Mon May 13, 2013 2:30 pm
- Location: Surrey/Hampshire
- Contact:
Re: 289 build
Thanks for the advice - I'll get me some springs...
Progress this weekend - the engine went in without a hitch. Wooop! Thanks to 'kenv' for coming over to help out.
Here's a 1 minute video - we work fast!
youtu.be/I5ZqMU9Lw2M
Progress this weekend - the engine went in without a hitch. Wooop! Thanks to 'kenv' for coming over to help out.
Here's a 1 minute video - we work fast!
youtu.be/I5ZqMU9Lw2M
-
amulheirn
- T289R Committee
- Posts: 1207
- Joined: Mon May 13, 2013 2:30 pm
- Location: Surrey/Hampshire
- Contact:
Re: 289 build
An overdue update for anyone interested:
I went down to see Gerry to get some bits and inspiration. He's got a new 'museum' if you've not seen it. It was a lovely sunny day, and I got to take a load of photos that I'll tweet over the next few months.
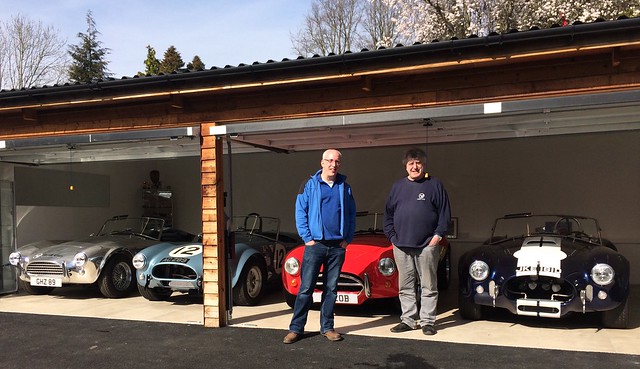 A trip to see Gerry Hawkridge
We discovered that the Scott Drake air-filter, Holley carb and Weiand Stealth combination would not clear the bonnet unfortunately. Roger told me it was probably the Stealth, and he was right. Instead of replacing it with an Edelbrock, we used the lower plate of another air filter with the top half of the Scott Drake. The lower plate was more dished, which solved the clearance problem but now it fouled on part of the carb. So I bought a 0.5" carb to filter spacer from John Woolfe Racing. Play-Doh in penis-shaped pieces is quite useful in figuring all this out. Just don't get penis-coloured Play-Doh or it gets too disturbing for words:
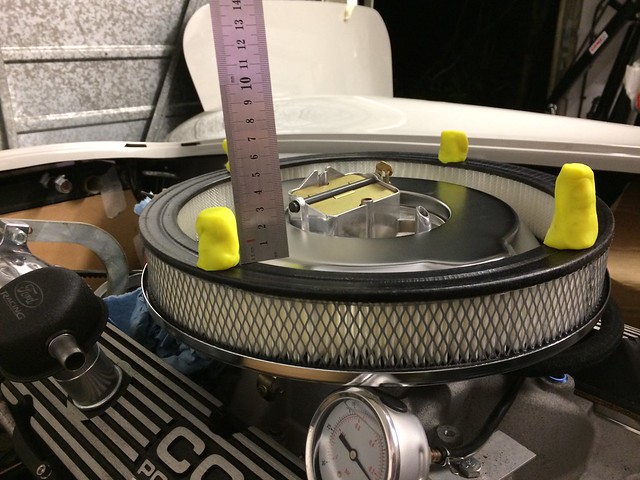 Checking for bonnet clearance with Play-Doh
We fitted the seatbelt frame. First, drill holes upwards from underneath using the ready-made holes in the chassis as a guide. These were slightly enlarged from the top with a dremel:
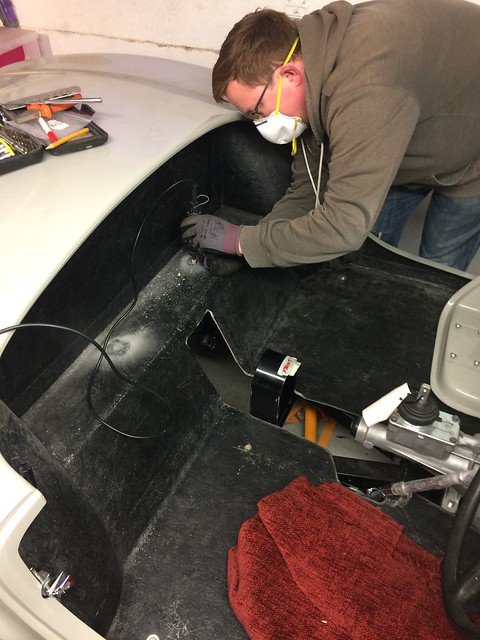 Enlarging holes for seatbelt frame.
These straps are supplied. The boss end needs to go through the bulkhead between boot and passenger compartment so you'll need a hole-saw like this:
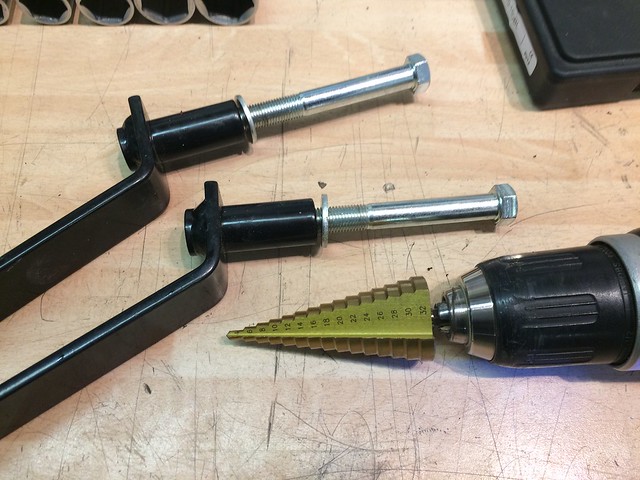 Top end of seatbelt frame straps
With the frame fitted using the two underneath bolts, drill through the holes in the ends of the frame through the fibreglass in to the boot. At this point the fibreglass is a sandwich of GRP and ply, so it is thicker than you expect:
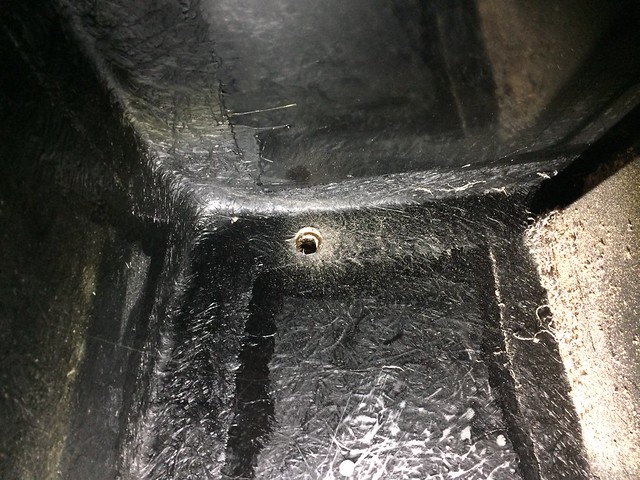 Hole through which seatbelt frame strap boss passes to meet the frame in the passenger compartment.
Fit the rear strap in the boot - there is no hole at the end where it needs to bolt through the chassis. If you've got this right, the flattened end of the strap will be over one of the bolts going through the body and chassis. Remove that bolt, and drill upwards through the chassis rail just enough to mark the end of the strap. Remove the strap again and drill the hole fully, then refit using the bolt you removed to secure it:
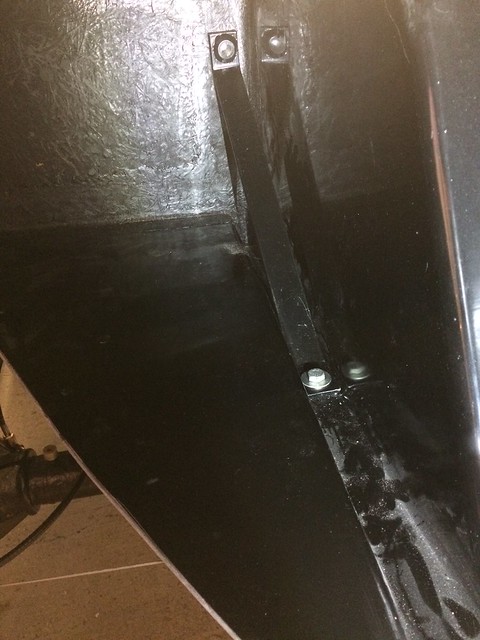 seatbelt frame rear strap - offside
Here's the nearside done likewise:
 Seatbelt frame strap - nearside
Finished result looks like this - the silver bolt heads you can see at the right hand and left hand ends are what goes into the bosses on the straps:
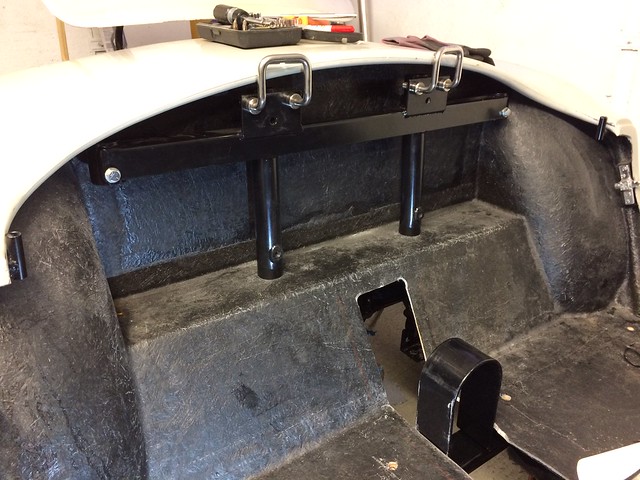 Seat belt frame
Then we turned to the loom, which took a long time to arrive. One thing to note - if you are using a ballast, you need to specify this when ordering. I was not asked, and the ballast wire was missing. So I have had to run an extra wire and re-wrap the loom. Here's what the three looms look like on my kitchen floor. Take your time with this - it is highly recommended to go through each wire against the wiring list and apply a masking-tape label to the end of each. This will doubtless save much frustration in the long run:
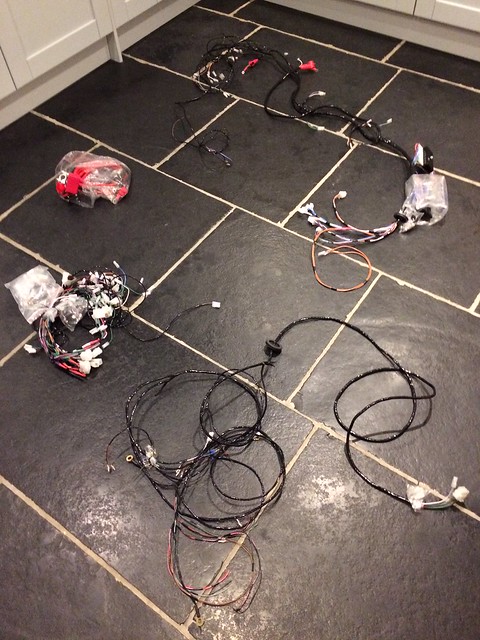 Hawk wiring looms
Laying out the loom for the rear - note the blue masking tape labels:
 rear wiring loom
Created a bracket for the relays and fuses to go above the steering column under the dash. The fuses face down to enable replacement. This photo is taken looking upwards at the underside of the steering column:
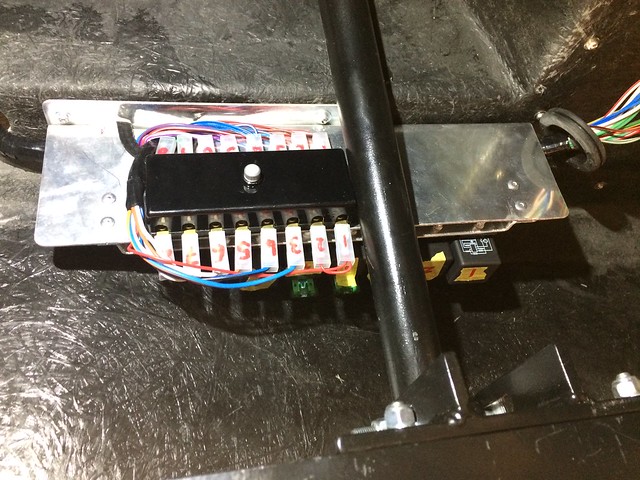 Fuses
Fuses
There's more progress, but will update later.
Have a good bank holiday weekend everyone,
Andy
I went down to see Gerry to get some bits and inspiration. He's got a new 'museum' if you've not seen it. It was a lovely sunny day, and I got to take a load of photos that I'll tweet over the next few months.
A trip to see Gerry HawkridgeWe discovered that the Scott Drake air-filter, Holley carb and Weiand Stealth combination would not clear the bonnet unfortunately. Roger told me it was probably the Stealth, and he was right. Instead of replacing it with an Edelbrock, we used the lower plate of another air filter with the top half of the Scott Drake. The lower plate was more dished, which solved the clearance problem but now it fouled on part of the carb. So I bought a 0.5" carb to filter spacer from John Woolfe Racing. Play-Doh in penis-shaped pieces is quite useful in figuring all this out. Just don't get penis-coloured Play-Doh or it gets too disturbing for words:
Checking for bonnet clearance with Play-DohWe fitted the seatbelt frame. First, drill holes upwards from underneath using the ready-made holes in the chassis as a guide. These were slightly enlarged from the top with a dremel:
Enlarging holes for seatbelt frame. These straps are supplied. The boss end needs to go through the bulkhead between boot and passenger compartment so you'll need a hole-saw like this:
Top end of seatbelt frame strapsWith the frame fitted using the two underneath bolts, drill through the holes in the ends of the frame through the fibreglass in to the boot. At this point the fibreglass is a sandwich of GRP and ply, so it is thicker than you expect:
Hole through which seatbelt frame strap boss passes to meet the frame in the passenger compartment. Fit the rear strap in the boot - there is no hole at the end where it needs to bolt through the chassis. If you've got this right, the flattened end of the strap will be over one of the bolts going through the body and chassis. Remove that bolt, and drill upwards through the chassis rail just enough to mark the end of the strap. Remove the strap again and drill the hole fully, then refit using the bolt you removed to secure it:
seatbelt frame rear strap - offsideHere's the nearside done likewise:
Seatbelt frame strap - nearsideFinished result looks like this - the silver bolt heads you can see at the right hand and left hand ends are what goes into the bosses on the straps:
Seat belt frame Then we turned to the loom, which took a long time to arrive. One thing to note - if you are using a ballast, you need to specify this when ordering. I was not asked, and the ballast wire was missing. So I have had to run an extra wire and re-wrap the loom. Here's what the three looms look like on my kitchen floor. Take your time with this - it is highly recommended to go through each wire against the wiring list and apply a masking-tape label to the end of each. This will doubtless save much frustration in the long run:
Hawk wiring looms Laying out the loom for the rear - note the blue masking tape labels:
rear wiring loom Created a bracket for the relays and fuses to go above the steering column under the dash. The fuses face down to enable replacement. This photo is taken looking upwards at the underside of the steering column:
Fuses There's more progress, but will update later.
Have a good bank holiday weekend everyone,
Andy
-
amulheirn
- T289R Committee
- Posts: 1207
- Joined: Mon May 13, 2013 2:30 pm
- Location: Surrey/Hampshire
- Contact:
Re: 289 build
A bit of a mad dash on right now to get the car ready for IVA on the 30th April. Eeek...
Fitted the exhaust system (a few times, after discovering that the Hawk headers needed some 'adjustment' to clear the spark plugs. Probably a result of using aftermarket cylinder heads on my engine): Fitted the boot handle and numberplate light. I think the handle can remain in place for IVA since the ends turn in, but I might remove it and replace with an escutcheon just in case: Finally, I bought a speedo cable from Speedograph Richfield who were much speedier than another company I could mention. Had to buy the yellow drive gear, clip and seal from Real Steel: We then pushed the car forward 6 wheel revolutions and counted the number of drive-cable turns: All so that the speedo can be sent to Speedograph Richfield for calibration: Loads of things to do still. More updates soon hopefully.
Fitted the exhaust system (a few times, after discovering that the Hawk headers needed some 'adjustment' to clear the spark plugs. Probably a result of using aftermarket cylinder heads on my engine): Fitted the boot handle and numberplate light. I think the handle can remain in place for IVA since the ends turn in, but I might remove it and replace with an escutcheon just in case: Finally, I bought a speedo cable from Speedograph Richfield who were much speedier than another company I could mention. Had to buy the yellow drive gear, clip and seal from Real Steel: We then pushed the car forward 6 wheel revolutions and counted the number of drive-cable turns: All so that the speedo can be sent to Speedograph Richfield for calibration: Loads of things to do still. More updates soon hopefully.
You do not have the required permissions to view the files attached to this post.