
Hi Martin, I run a single phase, 14cfm, 3hp compressor, but use a LVLP gun (low volume, low pressure) for bigger jobs and a HVLP (high volume, low pressure) for smaller work. I have no issues with pressure drop off, but on larger jobs the compressor is running pretty much constantly, though it shuts off very quickly, and is up to full pressure almost straight after I stop painting. I drain it after every use and have three high quality water traps in line. I also have a water trap on the gun and one on my airfed mask. I'm able to get the same paint texture finish with this set up, as I was with the big 3 phase compressor I had in my bodyshop. It runs air tools such as a DA sander, air chisels, cut off saws etc without any issues. Unlike my workshops, the airline isnt plumbed in around the walls and the airline is probably only 35-40ft or so long, which will help reduce pressure drop off. This is long enough to get around a car ok. If I plug in my other airline (30-40 ft) to work outside, I do notice drop off then.
Cheers.... Nige
Well, that didn't fit
-
nikbj68

- T289R Member

- Posts: 1475
- Joined: Thu Jul 17, 2008 3:31 pm
- Location: Anglesey, North Wales.
- Contact:
Re: Well, that didn't fit
As long as the 3mm tape goes pretty much full width of the roof flange, I would have thought it would be safe enough as your fit is so accurate all the way around, unless when you tighten the roof down it compresses too much...but to be honest, the 6mil gap looks just fine, and will probably squish down a bit when you tighten it anyway!agnoraan wrote:...I had initially set up the gap between the roof and the body using 3mm foam seals. I thought it might be better to use 6mm for added security against scratching the bodywork. I fitted some to the roof, but it now seems too wide a gap between the two panels. Having looked at pictures of other Le Mans hardtops, they all seem to have quite big gaps, so maybe I should leave it as is with the 6mm...
Can't wait to see it with stripes and glass fitted, where are you with sidescreens?
Hawk 289 FiA...AT LAST!!!
Re: Well, that didn't fit
Where am I with sidescreens?? Gimme a chance, I haven't finished the roof yet  , I'll be making those in the next few weeks, next job is the split boot, followed by the new dash
  I'll stick with the 6mm for now and maybe try the 3mm if the 6 irritates me.
Cheeers...Nige
Cheeers...Nige
-
Dave Woodward

- T289R Member
- Posts: 914
- Joined: Sun May 06, 2007 10:00 pm
- Location: Cheshire
- Contact:
Re: Well, that didn't fit
FFS. That is absolutely stunning work. I'm speechless!
__________________________________
I say, ding dong!
I say, ding dong!
Re: Well, that didn't fit
Thanks Dave, that's a really nice compliment  I was going to put up a few more tonight but Photobucket's decided to carry out maintenance, so I'll post them up tomorrow if I get a chance
cheers..Nige
cheers..Nige
Re: Well, that didn't fit
One thing that is vitally important when painting fibreglass is to ensure that you find all of the voids, which is air trapped between the glass fibre matting layers and the gel coat, if you don't then you'll get loads of little blisters appear in the paintwork when the roof gets hot. I used two hot air guns to heat the roof, doing a small area at a time to try and find any void imprerfections in the gel coat surface. Once found, the void needs to be taken right back and repaired. This is an example of some that I found on the bottom edge of the roof, where it sits on the bootlid


Re: Well, that didn't fit
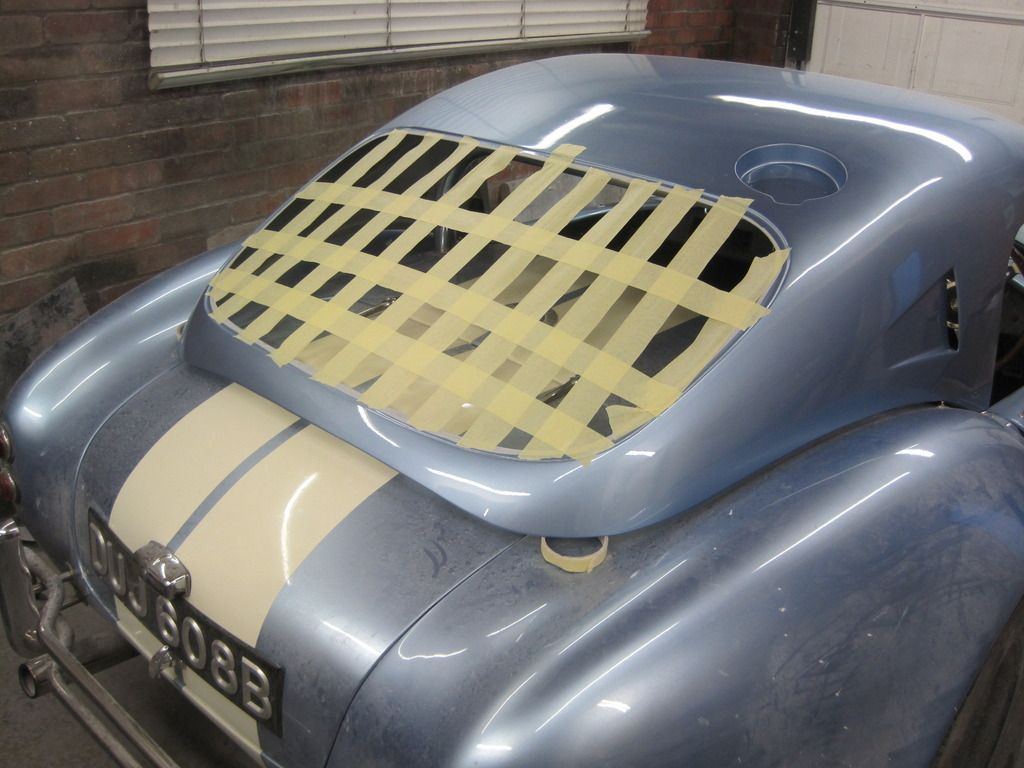
Next up was to fit the rear screen. I used some 2" masking tape to form the contours that the screen would take, this will support the masking paper that's being used as a template for the screen
A piece of masking paper was then laid tightly over the supporting tape, and the reveal was drawn onto the paper using the "brass rubbing effect"
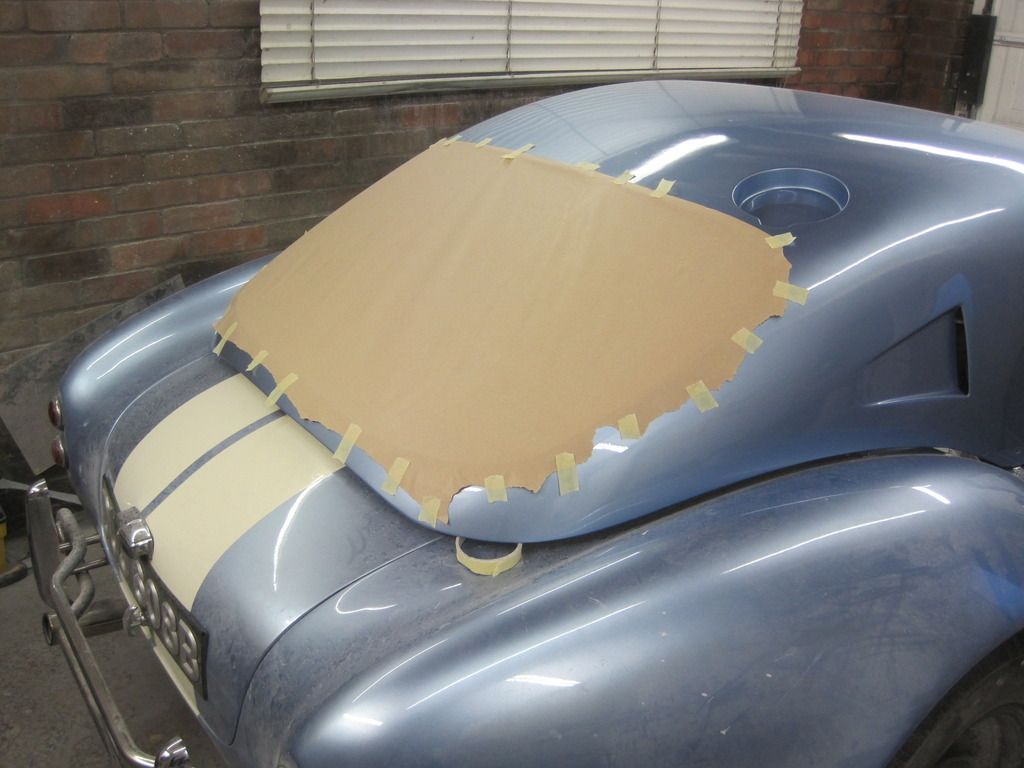
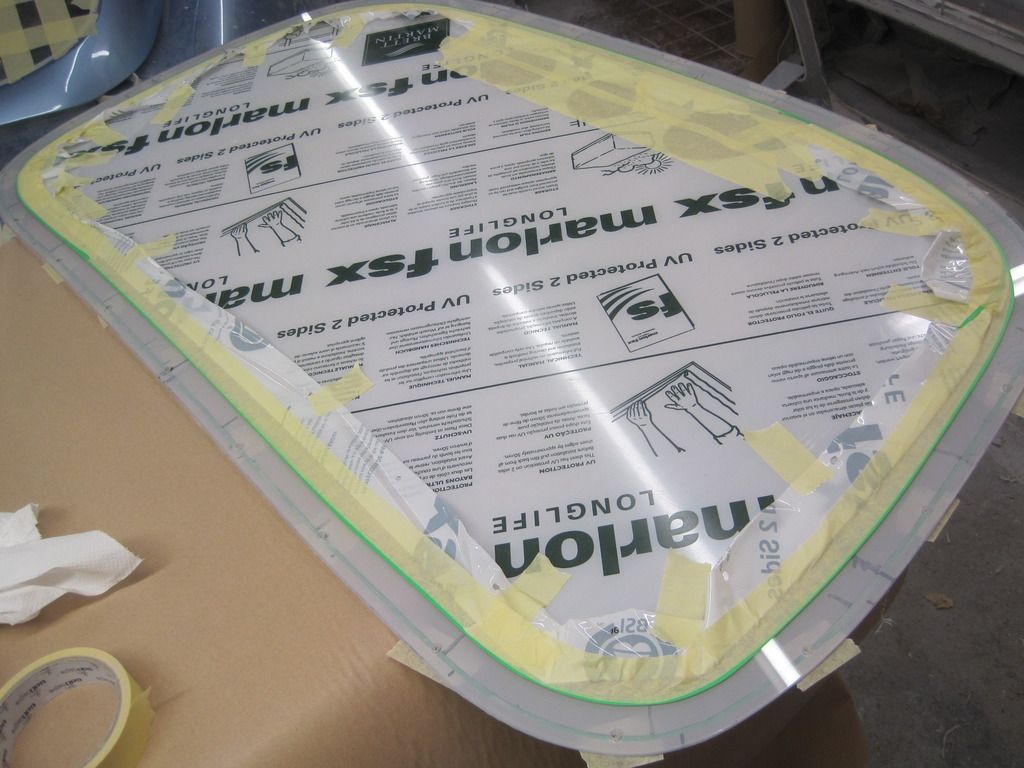
The paper was then cut to shape, with datum points marked on the paper and tape on the body to help align everything once it's transposed onto the acrylic sheet
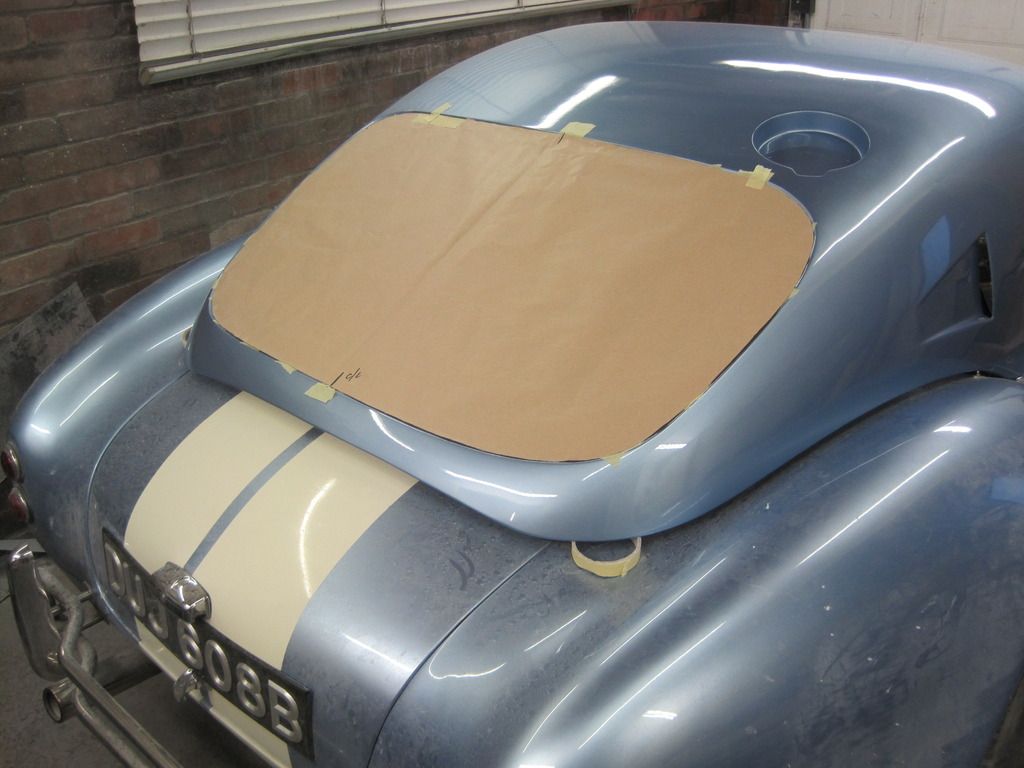
The shape was transferred to the acrylic, which was cut to shape using a fine toothed blade in the jigsaw, or the "puzzlesaw" as my mother in law called it Three 3" holes were also cut into it, to allow trapped air to get out...hopefully
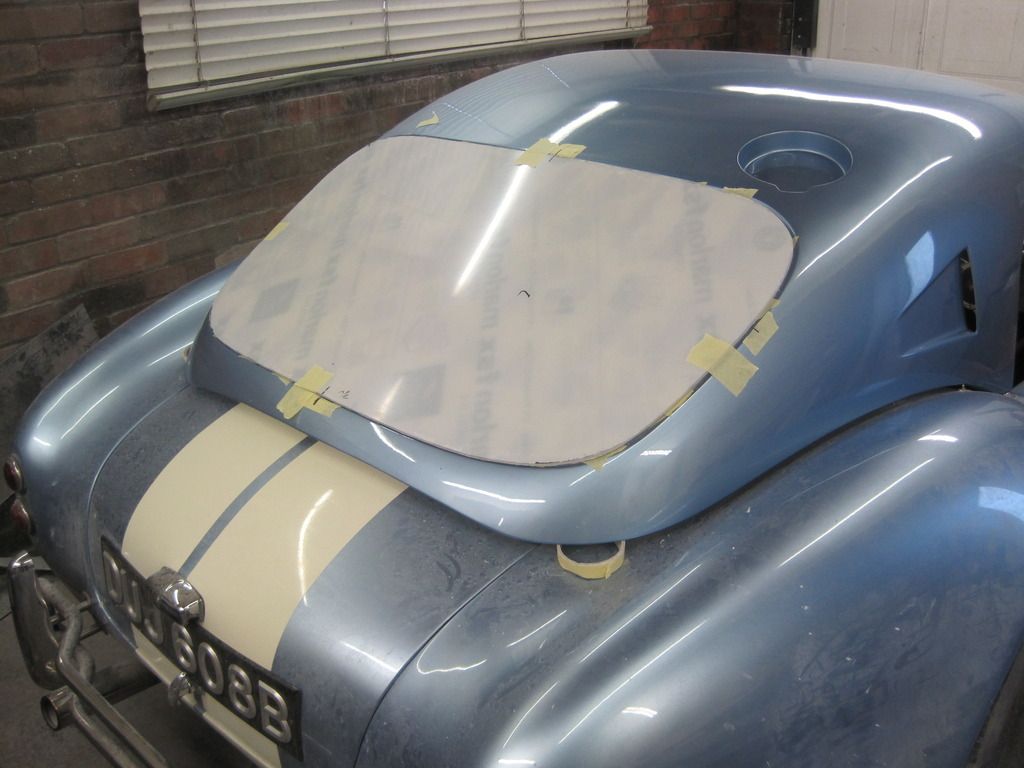
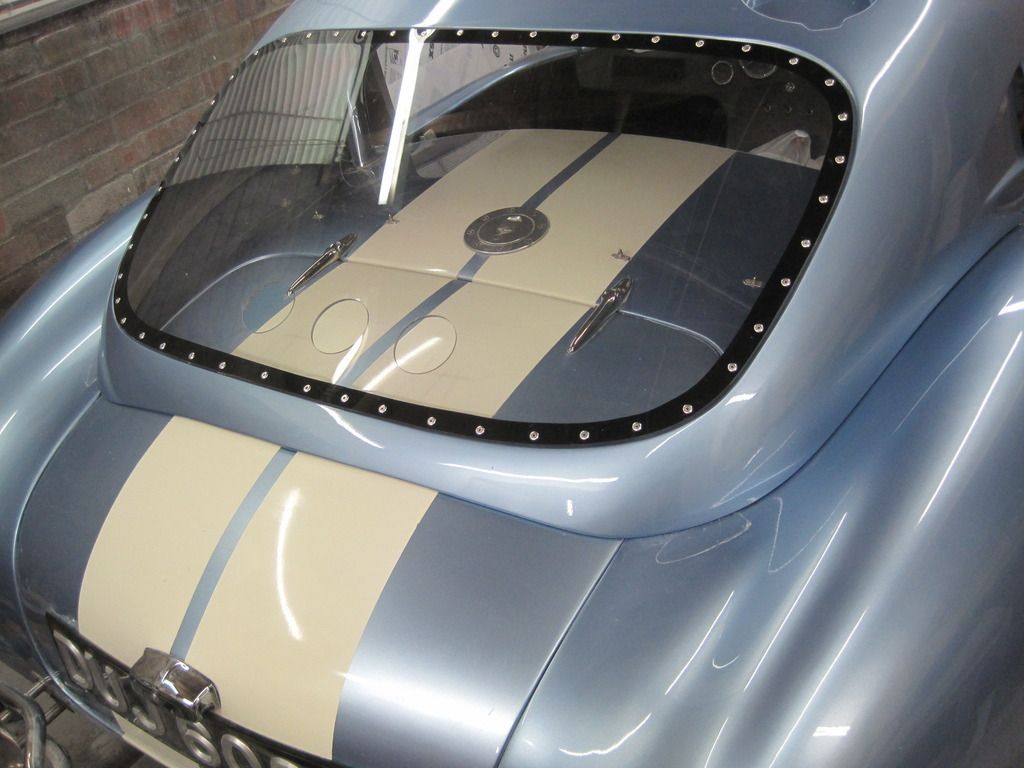
The inside of the laminate was then masked out so that a border could be sprayed in black, this would make it look much neater when viewed from outside
The window was the fitted into place using rivets. I put some 3mm foam seal around the aperture for the laminate to sit on prior to riveting it in place. Unfortunaty I ended up using twice as many rivets as I had intended. The laminate is 4mm thick, but once it was riveted into place the edge became rippled as it was pulled down into the foam seal. The remedy was to rivet in between the rivets, which thankfully made it all flat again
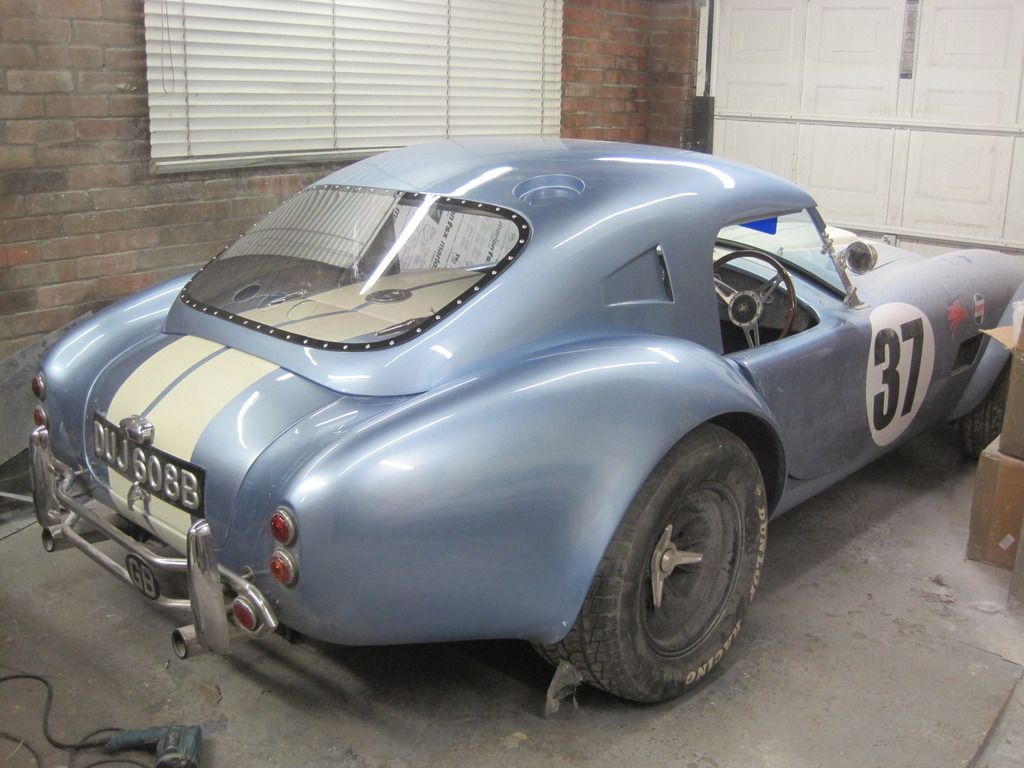
The paint was then flatted down so that it could be cut back and polished and then the stripes were added, which will also be flatted and cut back later today
.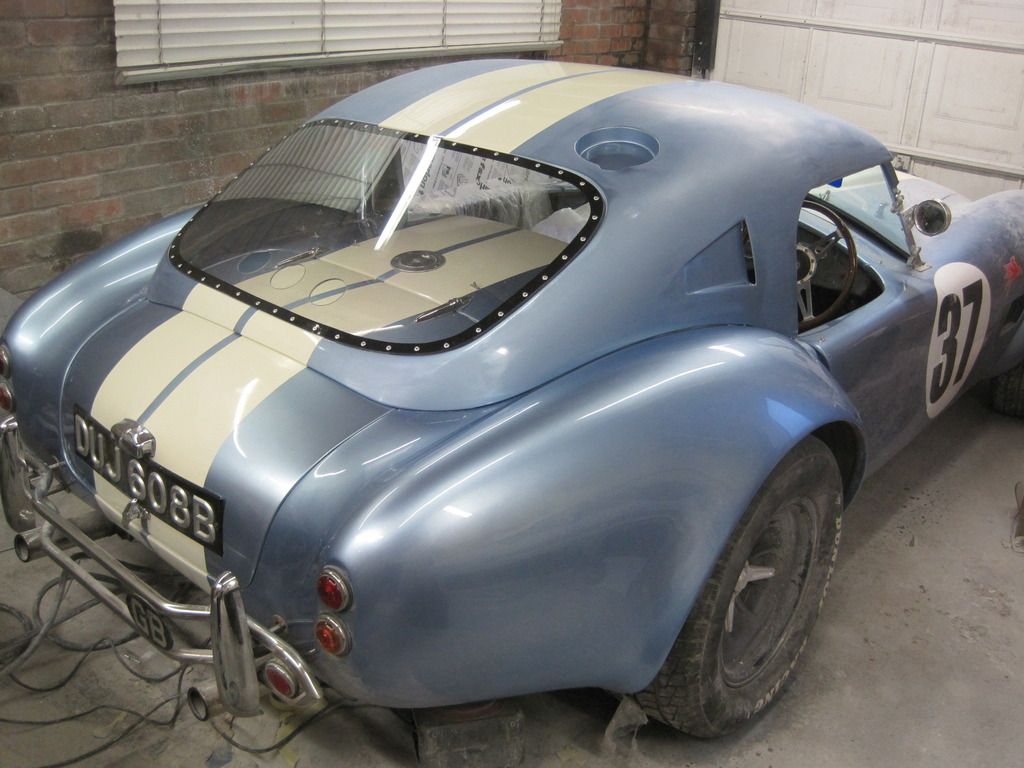
Well, the roof is nearly finished at last, now it's onto the next stage of its development
cheers...Nige

A piece of masking paper was then laid tightly over the supporting tape, and the reveal was drawn onto the paper using the "brass rubbing effect"

The paper was then cut to shape, with datum points marked on the paper and tape on the body to help align everything once it's transposed onto the acrylic sheet

The shape was transferred to the acrylic, which was cut to shape using a fine toothed blade in the jigsaw, or the "puzzlesaw" as my mother in law called it

The inside of the laminate was then masked out so that a border could be sprayed in black, this would make it look much neater when viewed from outside

The window was the fitted into place using rivets. I put some 3mm foam seal around the aperture for the laminate to sit on prior to riveting it in place. Unfortunaty I ended up using twice as many rivets as I had intended. The laminate is 4mm thick, but once it was riveted into place the edge became rippled as it was pulled down into the foam seal. The remedy was to rivet in between the rivets, which thankfully made it all flat again


The paint was then flatted down so that it could be cut back and polished and then the stripes were added, which will also be flatted and cut back later today
.

Well, the roof is nearly finished at last, now it's onto the next stage of its development
cheers...Nige
Last edited by agnoraan on Sun Jan 31, 2016 10:29 am, edited 2 times in total.
Re: Well, that didn't fit
Hi Alan, the air gets trapped in the fibreglass at the manufacturing stage. Yes, it's because the air expands under heat, and as you say it pushes outwards towards the surface of the panel. Various metal rollers, which have ridges milled into their surface, are used in the laminating process between each layer to "Squeegie" the air from the resin/mat. Sometimes the laminator might miss an area or there may be a point that the rollers cant get into. If this is the case, you would stipple the mat/resin with a stiff bristled brush to try to force the air out. Whilst the fibreglass is wet, if there are any air pockets trapped, you can actually see the air bubbles in the laminated work. if the void is deep down it 's not so much of a problem as it would have to force its way to the surface through a number of layers of fibreglass, which is nigh on impossible to do, unless it's one huuuge air pocket. In saying that though, you're aiming for a void free finish with every job you do. It's important that they're all removed in the laminating process, but the most important ones to remove are the ones between the gel coat and the resin itself, as the gel coat isn't very thick and is unable to hold expanding air back.catsx11 wrote:Is this because air expands in heat and pushes the fibre-glass out? I suppose it is impossible to avoid trapping some air? What about voids deep down? and why 2 heat guns?agnoraan wrote:...ensure that you find all…air trapped between the glass fibre matting layers and the gel coat, if you don't then you'll get loads of little blisters appear in the paintwork when the roof gets hot. I used two hot air guns to heat the roof...
The perfectionist in you is showing! I would have just stuck the foam over the abutment on that part of the roof!
Ordinarily, I would have painted the stripes first, but I didn't paint them before the laminate went in because the dew point was really high and I won't paint anything if it is above 50%, so I fitted the screen instead. Plus I had to flat the roof down prior to striping it, so it just made sense to save a little time and do it that way. The screen masked up ok where the stripes are
I have two heat guns joined together because it heats up an area that much quicker
cheers...Nige
-
nikbj68
- T289R Member
- Posts: 1475
- Joined: Thu Jul 17, 2008 3:31 pm
- Location: Anglesey, North Wales.
- Contact:
Re: Well, that didn't fit
Your attention to detail, such as the black edge around the screen, really set what you are going apart from virtually anyone I`ve come across...just fab! 

Might be different without sidescreens fitted, but I have found that rather than vent pressure, at speeds over 65mph the 3 holes in my hardtop screen vacuum rainwater in with such vigour that it only stops on contact with the back of the neck! Lovely!catsx11 wrote:...Holes in rear screen will also help expel unpleasant smells if you take a corner over-enthusiastically!
Hawk 289 FiA...AT LAST!!!