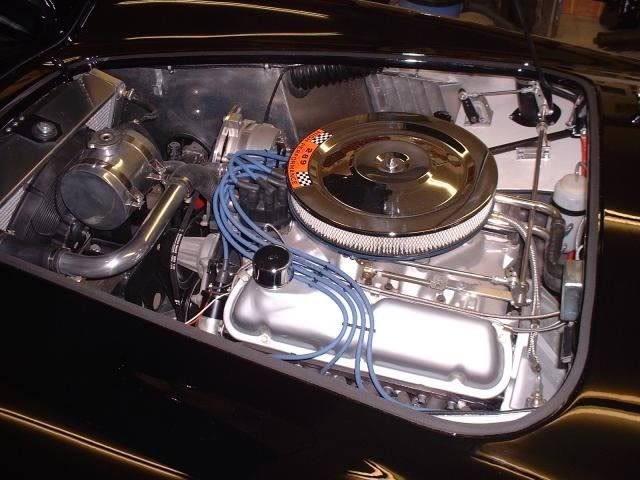
I have a set of Hawk headers for checking dimensions. Basically they fit, but they are very, very close to the motor mount. When I checked the mount in the car where I borrowed them from, the rubber had many cracks and some pieces had already fallen out. How is your experience? For the left side it is very easy to go back 20mm, for the right side(because of the starter motor) only 10mm is possible. Are you all running like this? I have been pointed to a company Sanderson in the US, which should fabricate very tight block huggers. Anybody any experience.
Please see the attached pictures for the situation. 1 and 4 is right hand side, 2 is left hand side
Regards Karl
SBF headers
SBF headers
You do not have the required permissions to view the files attached to this post.
Re: SBF headers
Karl,
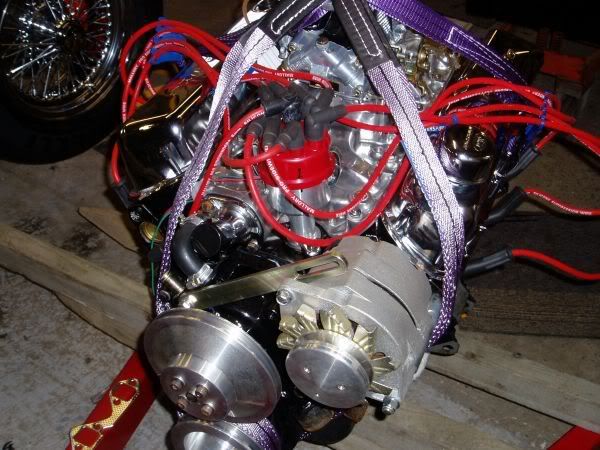
Looks like the standard position, never much of a space. I have wrapped a set of headers, does help, but the wrap will shorten the length of service in the headers. I have also had the header's cermantic coated, just cost a large amount of cash.
The cut very I have taken the standard headers and reduced the width by half an inch to give more space. So basically this is how they normally look, with the standard headers from Hawk
Thanks
John
Re: SBF headers
Hello Clive,
I think the picture attached is from your car. I think you have Gerry`s headers? Compared to the ones I borrowed for checking ( also Hawk) yours look a lot better in radius and workmanship. Would you have another picture from the RHside showing the mount - starter situation?
Also my crazy guy in the US mounted the alternator on the wrong side. I have just seen that there are three threaded holes on th LH side of the waterpumphousing for this. Any picture of this situation anybody?
Thanks Karl
You do not have the required permissions to view the files attached to this post.


Re: SBF headers
Hi Karl,
You are correct, that is my engine. Unfortunately that picture was taken before the body was put on and I don't have any of the other side. I have taken some tonight but it is difficult to get access to the engine mount or the starter. I used a Racemettle starter. http://www.racemettleltd.co.uk It is much smaller than the standard motor and can be removed/fitted without removing the headers. It can also be rotated so the solenoid can be mounted away from the heat of the header.
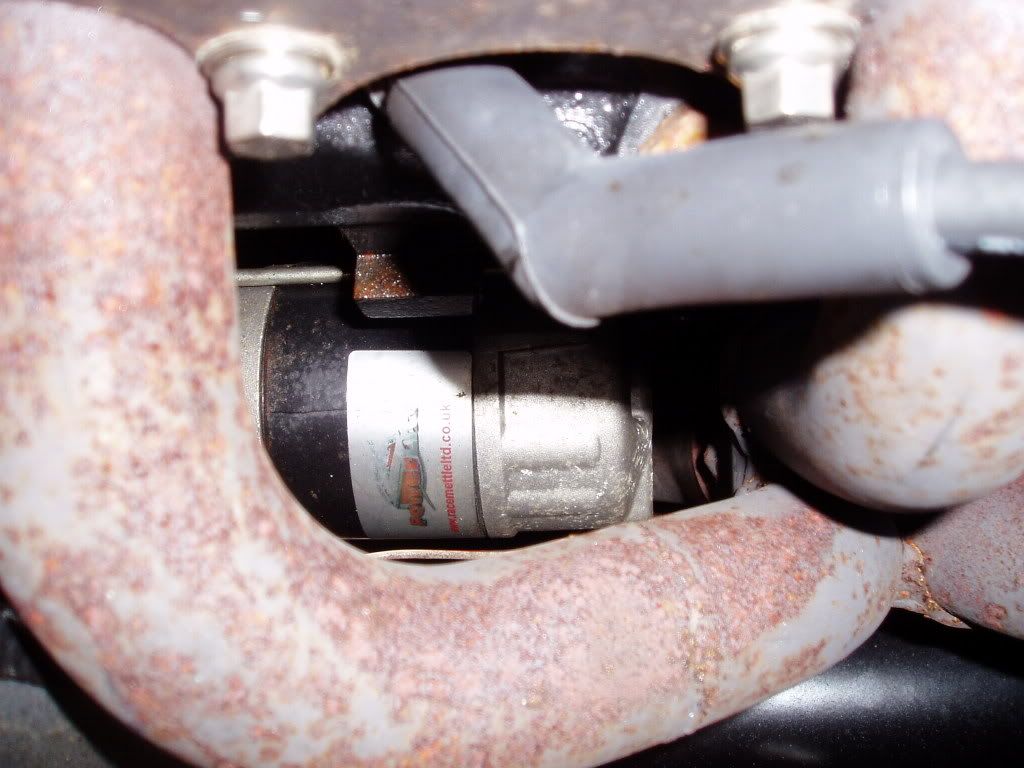
You are correct, that is my engine. Unfortunately that picture was taken before the body was put on and I don't have any of the other side. I have taken some tonight but it is difficult to get access to the engine mount or the starter. I used a Racemettle starter. http://www.racemettleltd.co.uk It is much smaller than the standard motor and can be removed/fitted without removing the headers. It can also be rotated so the solenoid can be mounted away from the heat of the header.
Last edited by clive on Mon Jan 21, 2008 11:09 pm, edited 2 times in total.
Cheers, Clive.
(If I'm not here I'm in my workshop or on the golf course!)
(If I'm not here I'm in my workshop or on the golf course!)
Re: SBF headers
Hi again Karl.
I have seen the alternator mounted on both sides of the engine, but it seems most have it mounted on the LHS.
These are pictures of my set up.
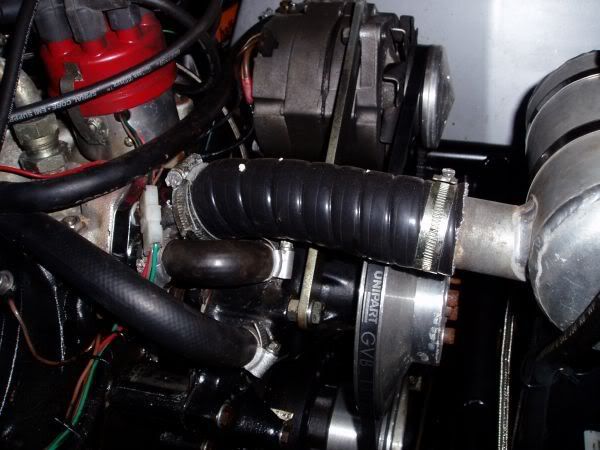
I have seen the alternator mounted on both sides of the engine, but it seems most have it mounted on the LHS.
These are pictures of my set up.
Cheers, Clive.
(If I'm not here I'm in my workshop or on the golf course!)
(If I'm not here I'm in my workshop or on the golf course!)
-
Roger King

- Posts: 4396
- Joined: Mon Mar 19, 2007 10:29 pm
- Location: St Ives, Cambs
Re: SBF headers
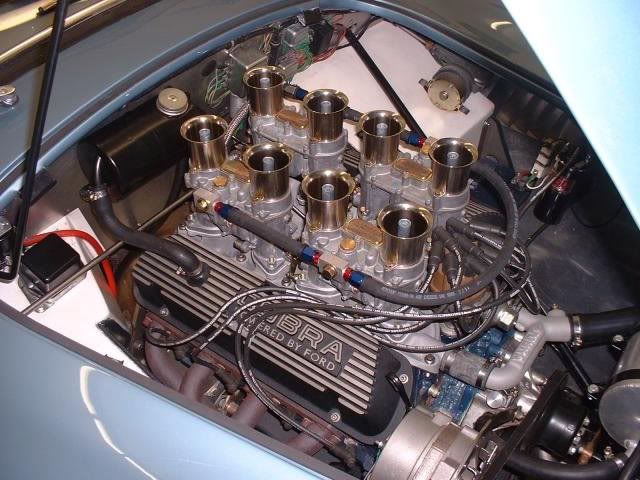
Gerry's kit mounts a GM (Chevy) alternator on the LHS - it's just easier to fit as it sits high. It also stays out of the way of the steering. Unless, of course, you're fitting p/s or a/c...
The stock Ford position (Mustangs, Fairlanes, Falcons, (oh, and original Cobras) etc.) is on the RHS.
Roger
The stock Ford position (Mustangs, Fairlanes, Falcons, (oh, and original Cobras) etc.) is on the RHS.
Roger
Re: SBF headers
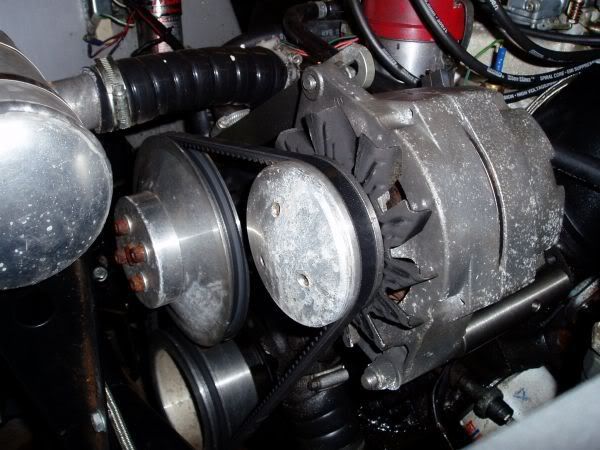
Hi Clive,
thanks for crawling round the car in nighttime, that gives me a good idea. Is your alternator only mounted at the two points visible? Don`t you have a triangeled bracket ( two connection points on waterpumphousing, one on bottom bolt alternator)?
Regards Karl
thanks for crawling round the car in nighttime, that gives me a good idea. Is your alternator only mounted at the two points visible? Don`t you have a triangeled bracket ( two connection points on waterpumphousing, one on bottom bolt alternator)?
Regards Karl
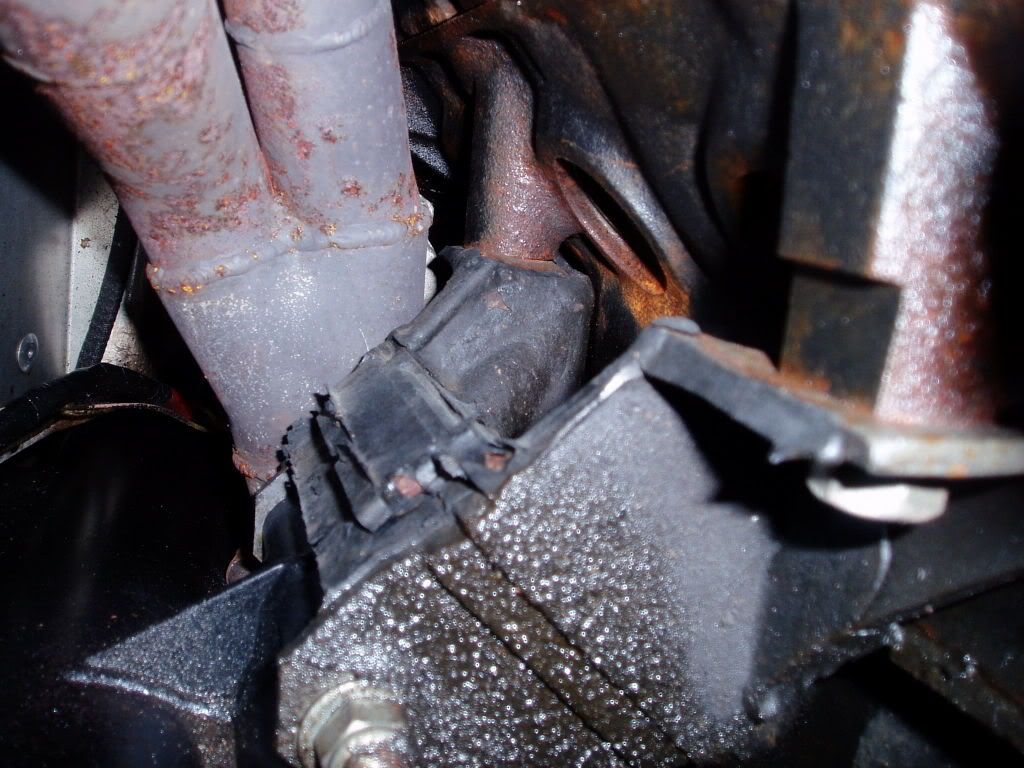
Re: SBF headers
Hi Karl,
The alternator is fitted to the front of the cylinder head by a "stud" that Gerry supplies.

The original one (Bottom one in the picture) was not quite the right length for my set-up and I had to fit a spacer between the face of the block and the stud, thus weakening the whole issue which led to it failing. The top one is a stainless steel one I made and altered the dimensions to suit my alternator.
The alternator is held by this stud and braced by the adjuster bar that is attached between the alternator and water pump housing.
ps. If I get a chance tomorrow I'll put the car over the pit and take a few more pictures of the engine mounts and starter from underneath.
The alternator is fitted to the front of the cylinder head by a "stud" that Gerry supplies.
The original one (Bottom one in the picture) was not quite the right length for my set-up and I had to fit a spacer between the face of the block and the stud, thus weakening the whole issue which led to it failing. The top one is a stainless steel one I made and altered the dimensions to suit my alternator.
The alternator is held by this stud and braced by the adjuster bar that is attached between the alternator and water pump housing.
ps. If I get a chance tomorrow I'll put the car over the pit and take a few more pictures of the engine mounts and starter from underneath.
Cheers, Clive.
(If I'm not here I'm in my workshop or on the golf course!)
(If I'm not here I'm in my workshop or on the golf course!)
Re: Alternator mounting
Here you can see what the US boys did. They used the waterpump studs to hold the alternator bracket also. The tensioning rod normally connects on the backside of the alternator top mounting. They grinded off some material from the bottom, so the fan wheel did not catch.
On the other side of the waterpump housing you can find three threaded holes (3/8 UNC), which do not hold anything. It is just a piece of threaded rod with a nut screwed in to make it look better! I think I will relocate the alternator to that side, have to make a new bracket and stud as Clive`s picture shows.
Regards Karl
You do not have the required permissions to view the files attached to this post.
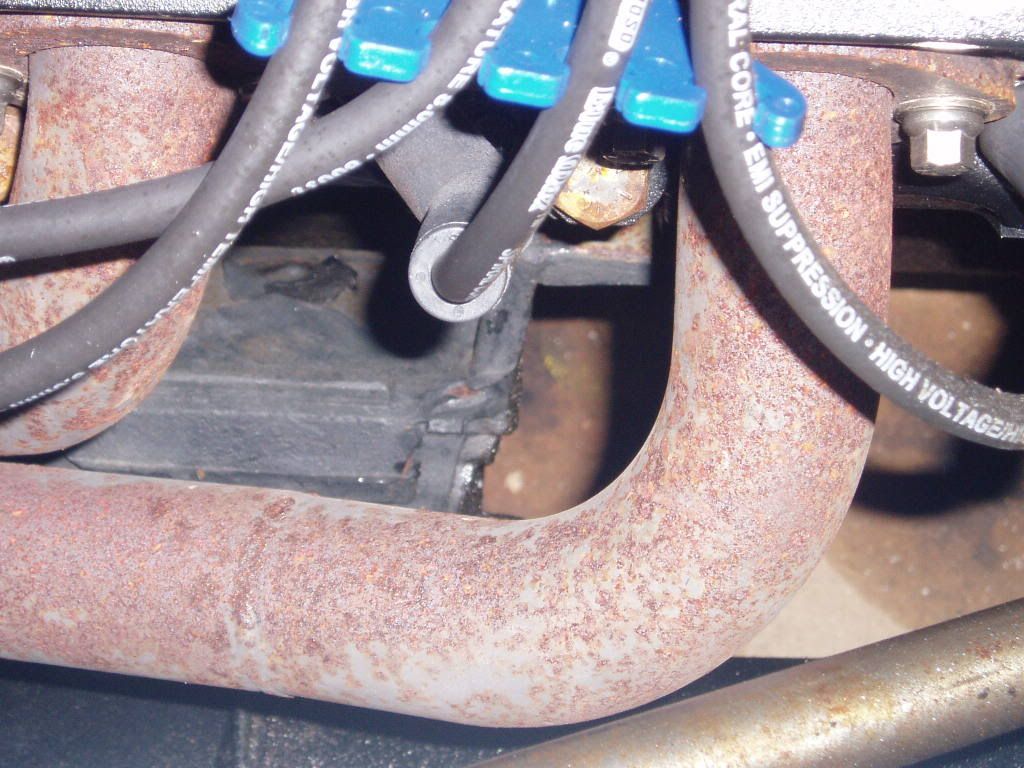
Re: SBF headers
Hi Karl,
Not very easy to photograph under the car in the dark, but I hope this gives you some idea. It also reminds me I need to fix the oil leak!
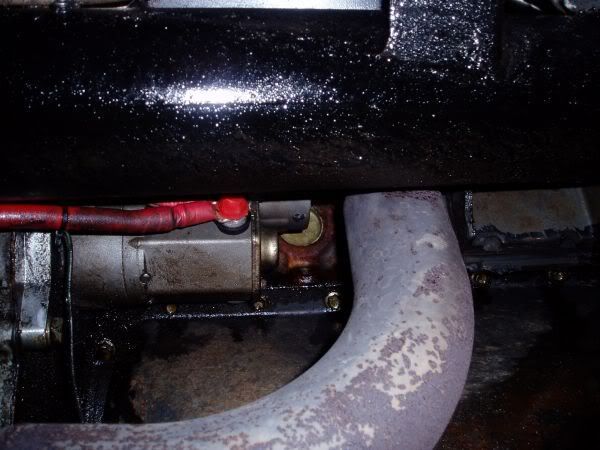
Not very easy to photograph under the car in the dark, but I hope this gives you some idea. It also reminds me I need to fix the oil leak!
Cheers, Clive.
(If I'm not here I'm in my workshop or on the golf course!)
(If I'm not here I'm in my workshop or on the golf course!)